Given the large size of the garden our house has surprisingly few outbuildings, and they are a motley crew, and ghastly to look at. I went to a local auction of garden equipment – looking for some Staging for my greenhouse – and bought a 1,700 sq.ft. barn!! I dunno … I clearly need my head looking at.
The auction started with lots containing oddments such as a Spade and a Pickaxe (I managed to buy a bucket full of Link Stakes, which I was pleased about as they cost a fortune and I got the bucket load for a couple of quid), the auction then moved to a number of lawnmowers and garden tractors, and then to the barn they were holding the auction in. Just the right size I thought 🙂 although the tin roof is a bit unsightly I got it for the reserve I had set myself – which saved me the embarrassment of getting carried away and regretting it later!
Although, having said that, I hadn’t given much thought to either how I would get the barn down, or back home! I thought of removing the nails from the weather board and de-constructing it to it individual parts, but the weatherboard was held on with ring-shank nails, and was clearly going to split when I tried to lever it off.
Plan B was to make vertical cuts every six feet, or so, adjacent to a vertical support, and thus convert it into an Ikea flat pack barn! It wouldn’t have looked very good when rebuilt with the vertical seams very obvious.
So I went with Plan C – move the panels “whole” back to base. Luckily the longest panel was only 40′ (Only!!) and 10′ high (Only!).

Barn - Before
6 July 2009
Day 1
Remove roof. Corrugated iron held on by long, twisty things. A swine to remove, and I have to try not to buckle the corrugations in the process. I’m getting a nice tan though!

Barn - Remove Roof
Day 2
Get the remainder of the roof off, and trailer them back to base. Took lots and LOTS of photographs in the hope it will help put it back together again.

Barn Roof Off
Day 3
There is a pretty Pergola on the house which I gather needs to come down. I’ve been wanting to put up a Pergola for some time, have agonised over the style and in fact their pergola is a much nicer style that I had been thinking of. I offer to take it down and cart it away for them to save them the bother; the building is Listed, so they have to obtain permission …
Removed the trusses from the central section, and the apex panel from the front. Eazy Peezy – just need the right tools!

Barn Disassembly Tools
Day 4
Remainder of middle bay walls removed

Push Down a Barn
and then the walls on the left bay. Padlocking the door on the right bay, for the night, seemed a bit pointless.

Barn Mostly Down
Day 5
Right bay is down!

Barn is now a Flat Pack
Carting some back to base on the trailer, rest left “flat pack” for a bigger trailer load
Day 6
Can’t get the big trailer anywhere near the site, so have to heft the panels up-and-over the fence and hedges and down a narrow track …

Carry Barn to Trailer
In order to get the panels on the JCB centre-of-gravity there was literally only inches of clearance down the path …
… and to the loading area – the trailer is 40′ long

Barn on a Trailer

Barn on a Trailer
Day 7
Next to unload them. Can’t get trailer into the garden, so unload them “over the fence”. Simples!

Barn Hedge Fun Day

Storing Barn Panels
Day 8
One more load. I dig up the perforated pipe around the base, and bag the gravel – well, that was the intention, but there was more gravel than I had got spare bags for, so have to take that in bulk – about 10 tonnes in all.

Ten Tonnes of Gravel
Left a tidy site

Barn Before and After
No news on the Listing Consent for the Pergola.
21 July 2009
Given permissions to take the Pergola down. Wey!Hey! (See the Pergola Project)
13 October 2009
With my customary Speed and Efficiency 🙂 I have now obtained planning permission to re-erect the barn, and got around to hiring a digger to lift the topsoil and dig some footings
This is the plan:
(Sorry, I’ve got a picture of the plan somewhere, I’ll mount it here as soon as I find it)
Day 1-5
Dig out topsoil. There is now a spectacular heap in the middle of the garden 😦

Dig Barn Footings
Spread some Type 1 across the base, lay the perforated drainage pipe, backfill with the bulk-retrieved gravel. Hired a wacker plate, shuttering for the concrete and something to tamp it down with.

Barn Footings Hardcore

Barn Drainage
Set up the shuttering (which took the best part of a day, getting the levels right), concrete comes tomorrow!

Barn Footings Shuttering
Day 6
The first concrete pour. Doing bay’s 1, 3 and 5. Will do bays 2, 4, and 6 second. I had planned to do Concrete pour on day 4, a Friday, and then the second pour on the Monday to give it time to go off, but the shuttering wasn’t ready, so had to push-back. Today is the Monday.
Used the local mixed-on-site people who were excellent, and lent a hand too. He managed to manoeuvre into our garden, through the tight access, and get right up to the foundations which saved a lot of time with barrows. Had Fibres added to the mix – to reduce cracking.

Barn Concrete Pour
Day 7
Nothing doing today, concrete has to go off. Took advantage of having the digger hire to move 5 dumper loads of manure round to the vegetable patch, reshape the pond, and dig a dozen planting holes for some trees I want to put in in November. Ah, and dig a trench for a water pipe to the greenhouse to save trapsing a hose across the lawn all Summer.
Day 8
Chucking it down. We’ve been bone dry for months, and today we have nearly two inches of rain. Pity that I didn’t manage to keep to my original schedule as I would have been done by a couple of days ago. Concrete lorry can’t get into the site as it will get stuck on the grass, so have to unload into a dumper and ferry round to the site. Takes longer, and we are like drowned rats at the end, and the rain dripping from the tree pits the surface of the fresh concrete; still, I reassure myself that its only a barn

Barn Concrete Raft Done
The base is done!
19 November 2009
Concrete raft has had time to go off, so now we can do the reverse of taking the barn down – let’s hope I have enough photographs for reconstruction. We prop up a couple of sides with a Forklift and a Digger, nail them together, and then add some more and park the digger holding the whole thing up for the night.

Barn Erection

Barn Propped Upright

Barn Squatters Rights
Important to stake a claim early for new properties around these parts!
Day 2
Middle section upright. Using the fork-lift to hold it all together for the night this time …

Barn Middle Erected
Day 3
Left section upright. Surprised how quickly we have been able to put it back together.

Barn Left Section Erected
Day 4
Roofing started – which will take 2 or 3 days.

Barn Roofing
but from the front it already looks like a barn 🙂

Looks like a Barn
and all done in time for the Winter

Barn in Snow
June 2013
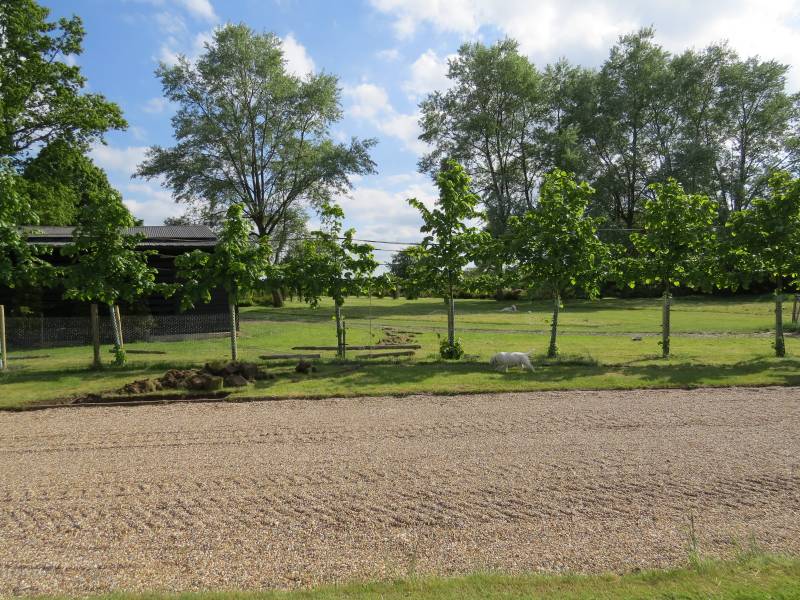
In making some changes to the end of the house facing the garden we decided that we needed to change the track to the barn.
Barn Track – Jun 2013
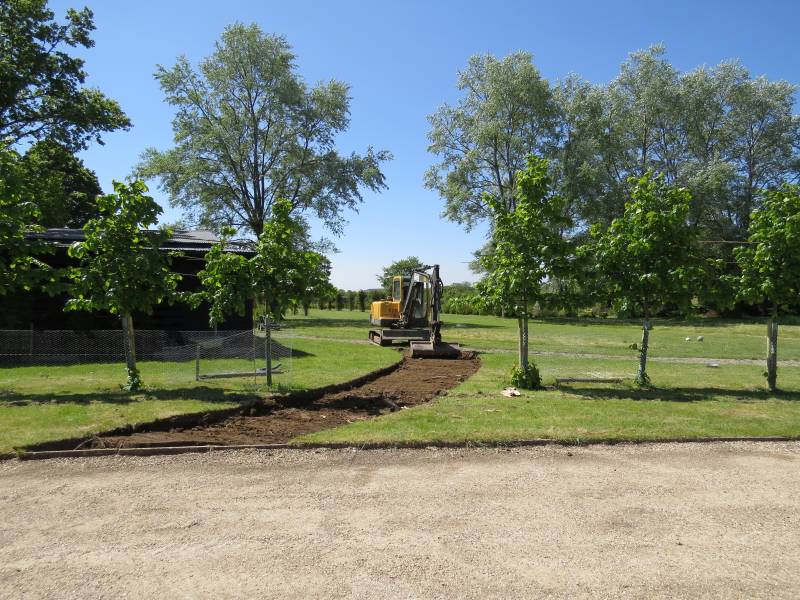
Barn Track – Jun 2013

Barn Track – Jun 2013
Barn Track – Jun 2013 – Before
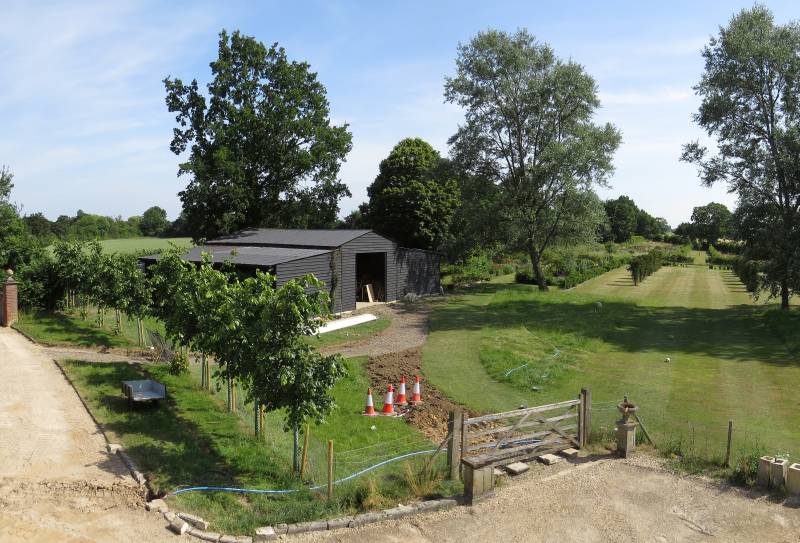
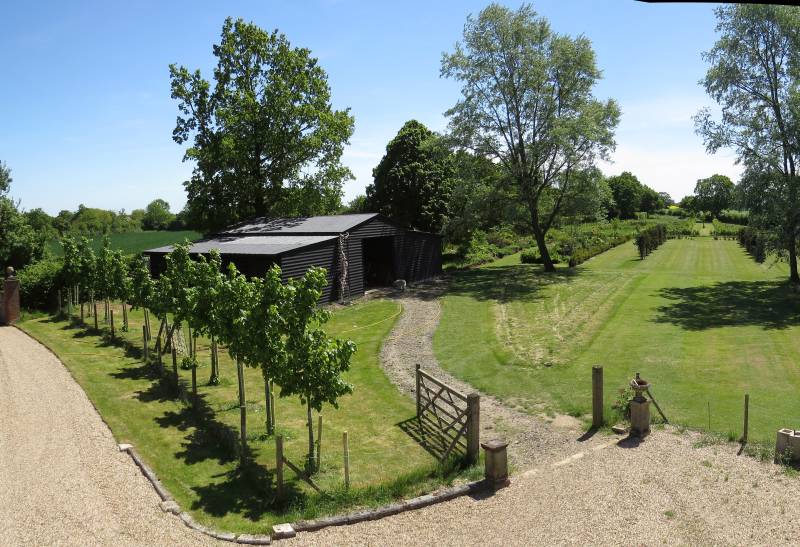
Barn Track – Jul 2013 – After
The original track was seeded with grass in Autumn 2013
Next: Versailles Planters

That looks fantastic – You must have been a civil engineer in a past life – not many people know what “type 1” is.
No, not an engineer, but an engineer told me it was called “Type 1” so I can now say that to make people think I’m clever!!