Index:
- Page 1 Article (this page)
Well … I haven’t been very successful at this, but here’s what I did in 2011, hopefully I can improve on it in future years.
The idea is to sow seeds in zip-lock plastic bags with some moist paper, the bags can easily be stored (in a shoe box) without taking up a lot of space, unlike seed trays, they can easily be stratified in the fridge, seeds that take ages to germinate won’t grow algae / weeds like they would outside, and for seeds that are erratic the ones that have germinated can be pricked-out (with tweezers if necessary) without disturbing their neighbours.
Trouble is – about 80% of my bags did not germinate at all. Although all those seeds were in the “hard to germinate” bracket, and I’ve never tried difficult seeds before, so … it may have been me.
Only thought I have is that there was very little air in the bags – in order to stack them easily I just zipped them up as normal, whereas perhaps I should have made them more “balloon” like.
Here’s what I did:
Note: Get zip-lock bags that have a panel you you write onto!
You’ll need some fungicide suitable for seedlings in a spray bottle. I used Cheshunt Compound, but that is no longer licensed in the UK, so some sort of fungicide suitable for seedlings

Fungicide Spray Mix / Bottle
I started off with a piece of kitchen paper and decided that cutting it into 1/3rd’s would fit the bag nicely.

Kitchen Paper
I folded it in half and inserted it with the folded-edge at the bottom of the bag. It needs a flat implement to push the kitchen paper into the bag. Do this with the kitchen paper dry (yeah, I did try wetting it first! that makes it impossible to them manipulate)

Insert Kitchen Paper into Bag
Probably best to label the bag before adding the seeds, harder to write on it once the bag is “fully loaded”
Then lay the bag on the table, hold open and hold up the top layer of kitchen paper, and arrange the seeds “evenly” on the paper. (You can hold the bag vertically, tip the seeds in in-between the two sides of kitchen paper, then put flat on the table to “arrange” the seeds)

Insert Seeds into Bag
Then lower the top side of kitchen paper, but keep the bag open

Top layer of paper pushed down, ready for moisture to be added
and spray some fungicide (suitable for seeds) to moisten the paper. Don’t do this with the kitchen paper “up” as it will move all the seeds around (if they are small). Yeah, I tried that too!

After spraying Fungicide into the bag/paper to add moisture
Kitchen paper or Coffee filters?
I found that the kitchen paper disintegrated after a month, and extracting the seedlings that I had got to germinate was a nightmare, so (after some internet research) I switched to using brown (unbleached) coffee filters which are much more robust.
Only snag with the coffee paper was that it is harder to see “through” and thus to tell that germination has begun. I held them up to a bright light to check them.
Labelling the bag
With the benefit of hindsight I would label the bag as follows:
Ref Number / Variety Name
 01-Jan'12 20C 2M
 01-Mar'12 4C 3M
 02-Jun'12 20C until germinated
The first date 01-Jan’12 is the date that the seeds were sown. The extra lines are written at that time with the duration of each action, but with no date in the first column. (well, the 01-Mar’12 date is written, because that is the date that of the next action (putting the bag in the fridge).
They needed to be put in the fridge on 01-Mar’12, but actually I did this until the 2nd so at that time I added the date 02-Jun’12 being the date of the next action (taking them out of the fridge).
I can then store the bags in a shoe box, in chronological order of next-action. I examine them once a week, but the ones at the front at those that are approaching their “next action”, which gives me a fighting chance of doing that at the right time!
The “Ref Number” is a sequential number relating to a spreadsheet I have where I have accumulated information about the germination requirements, and growing con conditions, that the plant will need.
Other tips:
Keep the bags upright, rather than flat, then when the seeds germinate the roots grown down between the paper layers, rather than through them (but cutting them out and pricking out complete with a small piece of paper is fine)
Watering with Hydrogen Peroxide (to kill of moulds): I see conflicting information about the strength of H2O2 to use – for example 0.15%, which seems too weak to do any good (but I guess also too weak to kill the seed!)
For small seeds it might be worth mixing with damp vermiculite instead, putting in a (tiny) vial in the fridge for stratification, and then “sowing” the whole lot as for normal seeds (i.e. ones that don’t need stratification). The ratio of seed to vermiculite is important so that when the combined mixture is “sown” the density of seed is “about right”
Pricking out
Typically “pricking out” will be as soon as the seed has started to germinate, so it won’t be a seedling at that time, so its kinda similar to sowing a seed straight into a seed-tray / pan, which is generally about 3x as deep as its diameter, with any root pointing downwards. For seed that needs “light to germinate” still bury it – it has already germinated, so doesn’t need light to germinate any more! and there is risk if it is too close to the surface that it pushes out of the soil and the root then tries to grow long the surface, where it will die if there is not enough humidity.
I found the information on this site very helpful:
http://www.robsplants.com/seed/baggy.php
Vermiculite Baggy Method
Update: I found that using filter paper / kitchen towel I could never get the air / moisture balance correct. It was far too easy to have too much water / not enough air, so I changed to using Vermiculite instead.
I put a couple of teaspoons of damp vermiculite in as small a zip-lock bag as will hold them (so that the seeds are in good contact with the vermiculite – a large bag means more vermiculite, or not good contact between the two sloshing around in the bigger bag; more vermiculite means that if I then tip the contents out to grow them on conventionally, in a small seed tray, that it needs a lot of surface area for the volume of vermiculite)
I suspect that a zip-lock bag with vermiculite makes it a bit harder to see when germination starts, and the root is a bit more developed before “pricking out”, but it seems to work OK for me. Possibly the Vermiculite helps reduce mould as I think it has a slight fungicidal property.
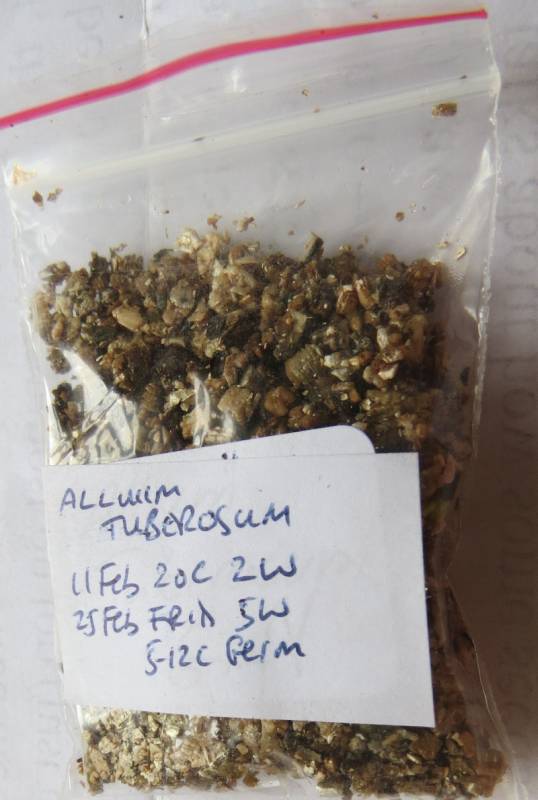
Vermiculite Baggy Method
The photo shows the labelling method I have adopted, mentioned earlier. I write the date that the seed was sown, and conditions / temperature required, and then a list of the follow-on conditions required, and periods, and then I write the date of the NEXT action. So when I am checking the bags in [my Tupperware box in] the fridge any that has passed the date are removed. I then calculate the next action date, adding the period that the bag should stay in those conditions, and write that next on label so that will be the date date that I next need to move the bag to different conditions.
These seeds were sown on 11-Feb and kept at 20C, and I had marked that they should be moved to Fridge after 2 weeks – around 25 Feb – and then when I put them in the fridge I would have written on the label the date, 5 weeks from the date of going into the fridge, to take them out for germination. As it happens these seeds had germinated in the 2 weeks before they went into the fridge, so none of that was actually needed.
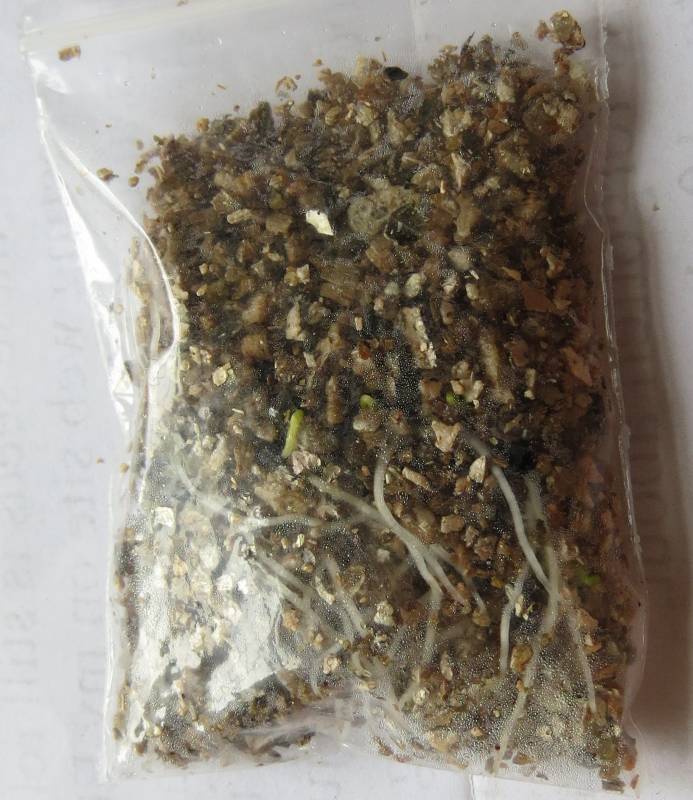
Vermiculite Baggy Method Germination

i have used this method with great effect not hard to do